
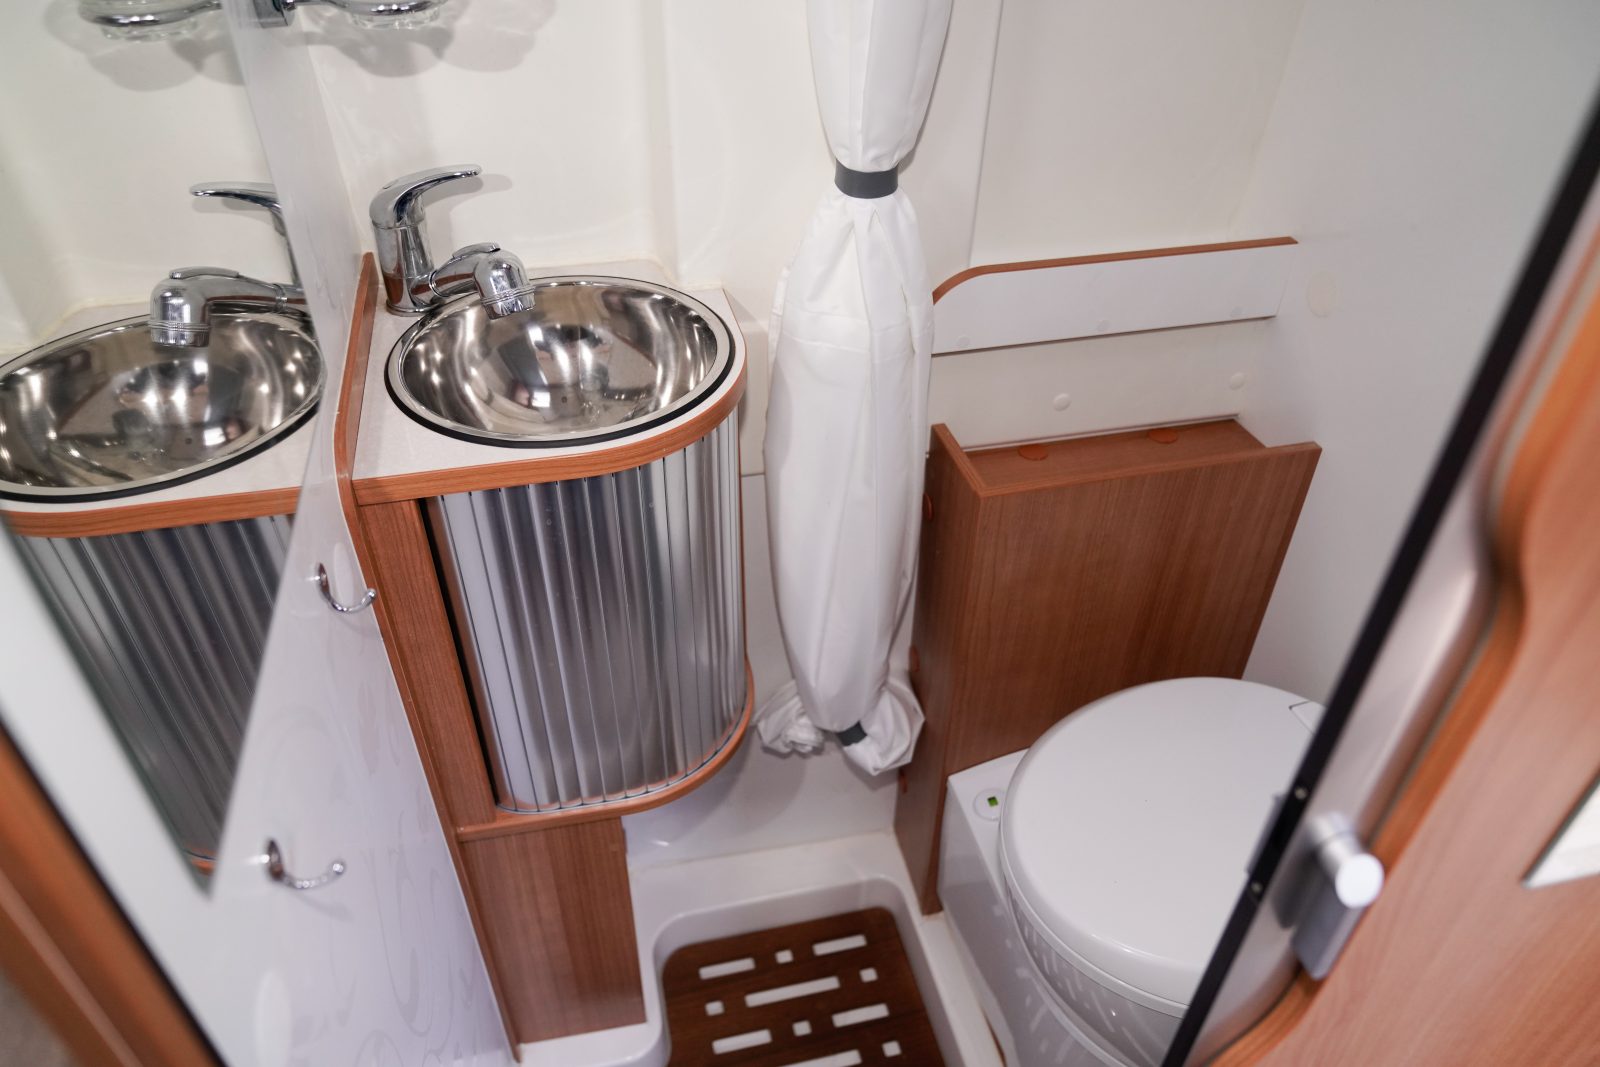
How to Give Your RV the Ultimate Bathroom Remodel
June 14th, 2021You’ll find no end of how-to advice on the subject of RV and camper bathroom renovations. We’ve done the research on RV bathroom remodels, and we’re here to sift out the silly stuff and help you organize a bathroom re-do from start to finish. Our first piece of advice? Easy–the word remodel is a lot less scary than the word renovation. Here’s all the best tips and tricks we could find to help you give your RV the ultimate bathroom remodel.
Take a breath–you’ve got this.
Bathroom Remodel: Function First
Often, RV renovations tiptoe around the bathroom remodel. Owners new to the RV construction and renovation game often start on the bigger areas, like the kitchen, bedroom and living areas, because plumbing and electricity are not the central issues. Frankly, RV kitchen remodels may eat up the lion’s share of a renovation budget. After all, kitchens are the beating heart of every home.
The bathroom? Well, if the toilet flushes, even if it’s grumpy, you can slide the door shut and think about it later…
But don’t be afraid. You can renovate your rolling bathroom with less money, and less prior know-how than you might think. Like every renovation project, you will run into challenges; that goes with the territory, but with planning, and a little vision, this is a project you’ll feel incredible pride in completing. You may even wonder what took you so long to get started.
Sharpen Your Pencil and Let’s Do This
Understanding your starting point is essential to mapping out a plan of attack. Before you haul out the toolbox, jot down the answers to these important considerations.
- How much damage exists, and what needs repair or replacement?
- What is your RV lifestyle?
- What is your budget?
Consider the Scope of the Job
Working on the assumption that you’re acquainted with the working systems in your rig, you’ll need to examine the lighting, the plumbing, the state of the fixtures, the walls, the flooring, the door, and address any evidence of mold in your bathroom.
Easy updates include new lighting, which can be as simple as stick-on LED lights, or replacement lighting fixtures that will need to be switched out and rewired in. Visual evidence of leaks will offer plumbing clues that may be fixed as quick as you can say, “where’s my caulk gun, honey?” Fingers crossed!
Generally, though, a more thorough inspection is preferable. A light, modern look for your new bathroom is the icing on the cake, as they say, but functionality and safety are key. Most likely, you’ll want to update the fixtures and bring them into the 21st Century. Bonus! You now have an opportunity to select sleek, well-designed, energy-efficient fixtures.
Laid Back or Full-Tilt Traveler?
Consider your lifestyle on the road. Are you a boondocker or dry camper? Or do you prefer RV communities with full hook ups? Maybe a little of both? Are you a weekend warrior? Or you do you live (and maybe even work) in your rig full time? These key considerations should determine cost and design. You may not even need an indoor shower, for example. On the other hand, you may be bathing an entire family. Comfort and efficiency are the goals. An investment is good design thinking beforehand will elevate your quality of life–and save you cash and headaches.
Show Me the Money
A quick Google search shows that you can spend as little as the cost of half a dozen cans of spray paint and some painter’s tape, or as much as, say, $5,000. A sound budget mapped out on paper should guide your decisions. Less is not necessarily more for this project, but creative resourcefulness will reward your wallet.
Keep in mind that although an RV bathroom is defined by curves and corners, electricity, and plumbing, it’s actually tiny in size. An RV bathroom remodel may feel challenging, but the size itself determines that you’ll use fewer materials. Most of the necessary tools are probably already in your toolbox.
Hint: Divide the labor! Putting a family member or friend to work on budget and sourcing allows you to focus on design, demolition, and re-engineering.
It’s easy to lose hours, even days, on researching and sourcing materials. In fact, so much content is available that we’ll leave you to it with this advice: choose lightweight materials, and create the illusion of space with light, analogous (related) colors.
Setting your RV Remodel Budget
As a starting point, we’ve included some ballpark estimates on the basics:
- Tankless water heater: $550; Cover and additional hardware: $30-$100.
- 6-gallon tank water heater: $400
- Shower enclosure: $100-$200
- Toilet $125
- Vanity and sink: $50-$200
- Sink tap fixtures: $30-$100
- Ceiling light: $15; Decorative light fixture: $15-$100
- Stick-on backsplash tiles: $25
- Can specialty spray paint: $16
- Specialty primer: $35 gallon
- Hardware: (hooks, rails, racks): $50-$100
- Accessories: Mirror, towels, shower curtain, etc.: $100-$500
Pro tip: For the tightest budgets, understand that you can simply refresh the bathroom with paint. Paint the shower, the sink, the faucets, everything, if you like. Make sure to prime the surfaces with several layers of specialized primer. Don’t skimp here! Because bathrooms are so small, spray paint is a manageable option. Make sure to wear a respirator, ventilate your rig as you work, and take plenty of breaks for fresh air. A pretty bathroom is not worth the cost of your health. On the plus side, there are dozens of talented RV influencers offering smart, creative bathroom painting tips online!
Measure Twice–Cut Once
Once you have a budget, a little knowledge of what you’re up against, and rough sense of the new bathroom design, break down your tasks in the correct order.
- Remove the sink, toilet, and shower stall.
- Examine the framework for any mold or water issues and address them at this stage. At the very least, scrub the entire room clean, including the floor, and dry it thoroughly.
- Pull out paneling, if desired. If there is no water damage, your simplest solution is to cover the existing (clean, dry) walls with new paint, stick-on paper or paneling, and cover the (clean, dry) flooring with stick-on flooring.
- Replace the ceiling light and fan.
- Address the plumbing; install new shower stall or tiles and shower pan.
- Install new fixtures.
- If your bathroom has a window, consider the Legacy Shade for privacy.
- Install décor, such as vanity mirror, shelving, hooks.
Tank or Tankless: The Hot Debate
A six-or ten-gallon water heater is a standard, economical install in most RVs and campers. Along with propane to heat your water, a tank allows a camping vehicle to be fully self-sufficient for life on the road.
Carrying your own water is its own reward, but the conversation gets, ahem, heated, when folks grumble about small tanks. Showers aren’t the only use of water, after all. The truth is that conserving water is a constant chore on the road, and while it’s not much fun to finish a hot shower cold, you can expect to experience shower interruptus occasionally. Travelers know to plan ahead, but this very issue comes up often.
A tankless water heater is hot water on demand for as long as you’d like to daydream under the showerhead. The argument for tankless water heaters is compelling: reviews suggest they are simpler to install and operate, smaller and lighter than water tanks, offer up to five or six gallons of hot water on command per minute, allow simultaneous water use, decrease risk of motorhome damage through spillage, and may even offer tax rebates.
Fans of tankless water heaters, which are slightly higher in price, love the obvious convenience of plenty of hot water. They don’t mind manually bumping the thermometer up or down, and they’re especially happy with the baked-in energy efficiency, especially with electric versions. Detractors argue that tankless water heaters are fussy, chronically too hot or too cold, and expensive to repair.
Big Project, Tiny Space: You’ve Got This!
It’s possible, of course, that by the time you tackle your all-important RV bathroom remodel, you will already have installed the right water heater for your camping lifestyle. Our takeaway from this much-debated issue is that some brands are more popular than others, and if you’re unsure about the installation, consider hiring a professional.
Make your plan. Assemble your materials. Grab your tools.
And remember, ask for help when you need it. Sometimes the best “tools” in the arsenal can be a friend who happens to be a plumber, an electrician with a couple of hours to spare, a fridge filled with ice-cold beverages, and pizza delivery on speed dial.
Good luck with all your RV renovations.
Join Us!
Recent Posts
- Getting Your RV Ready for the Upcoming Desert Season: Ensuring Optimum Shade with Well-Maintained Awnings
- Exploring National Parks in the Summer: RV Friendly National Parks and Hidden Gems
- Find Your Sunny Spot: The Top 4 RV Destinations for Warm Weather
- RV Cooking: Healthy and Delicious Recipes to Try in 2023
- ShadePro Holiday Guide: The Best Gifts For RV Owners



Leave a Reply